Signal Flow Guide
Managing a sound system involves understanding the concept of signal flow. Signals progress linearly from one component to another, similar to a relay race. Each component acts as a runner, passing the “baton” in the form of cables to move the audio signal forward. Whether you’re a beginner or an experienced audiophile, understanding how signals flow through your gear’s inputs and outputs is crucial for connecting and optimizing your stereo system. This guide provides valuable insights and tips to help you navigate your system and achieve optimal performance.
Managing a sound system isn't an easy task. While there are many hybrid (digital and analog) products out there, there's a chance that your stereo system is chock-full of different devices and components all working together to make a Hi-Fi sound and sonic profile. If you aren't there yet but want to be, there's one thing you need to master as you begin accumulating and connecting gear: signal flow.
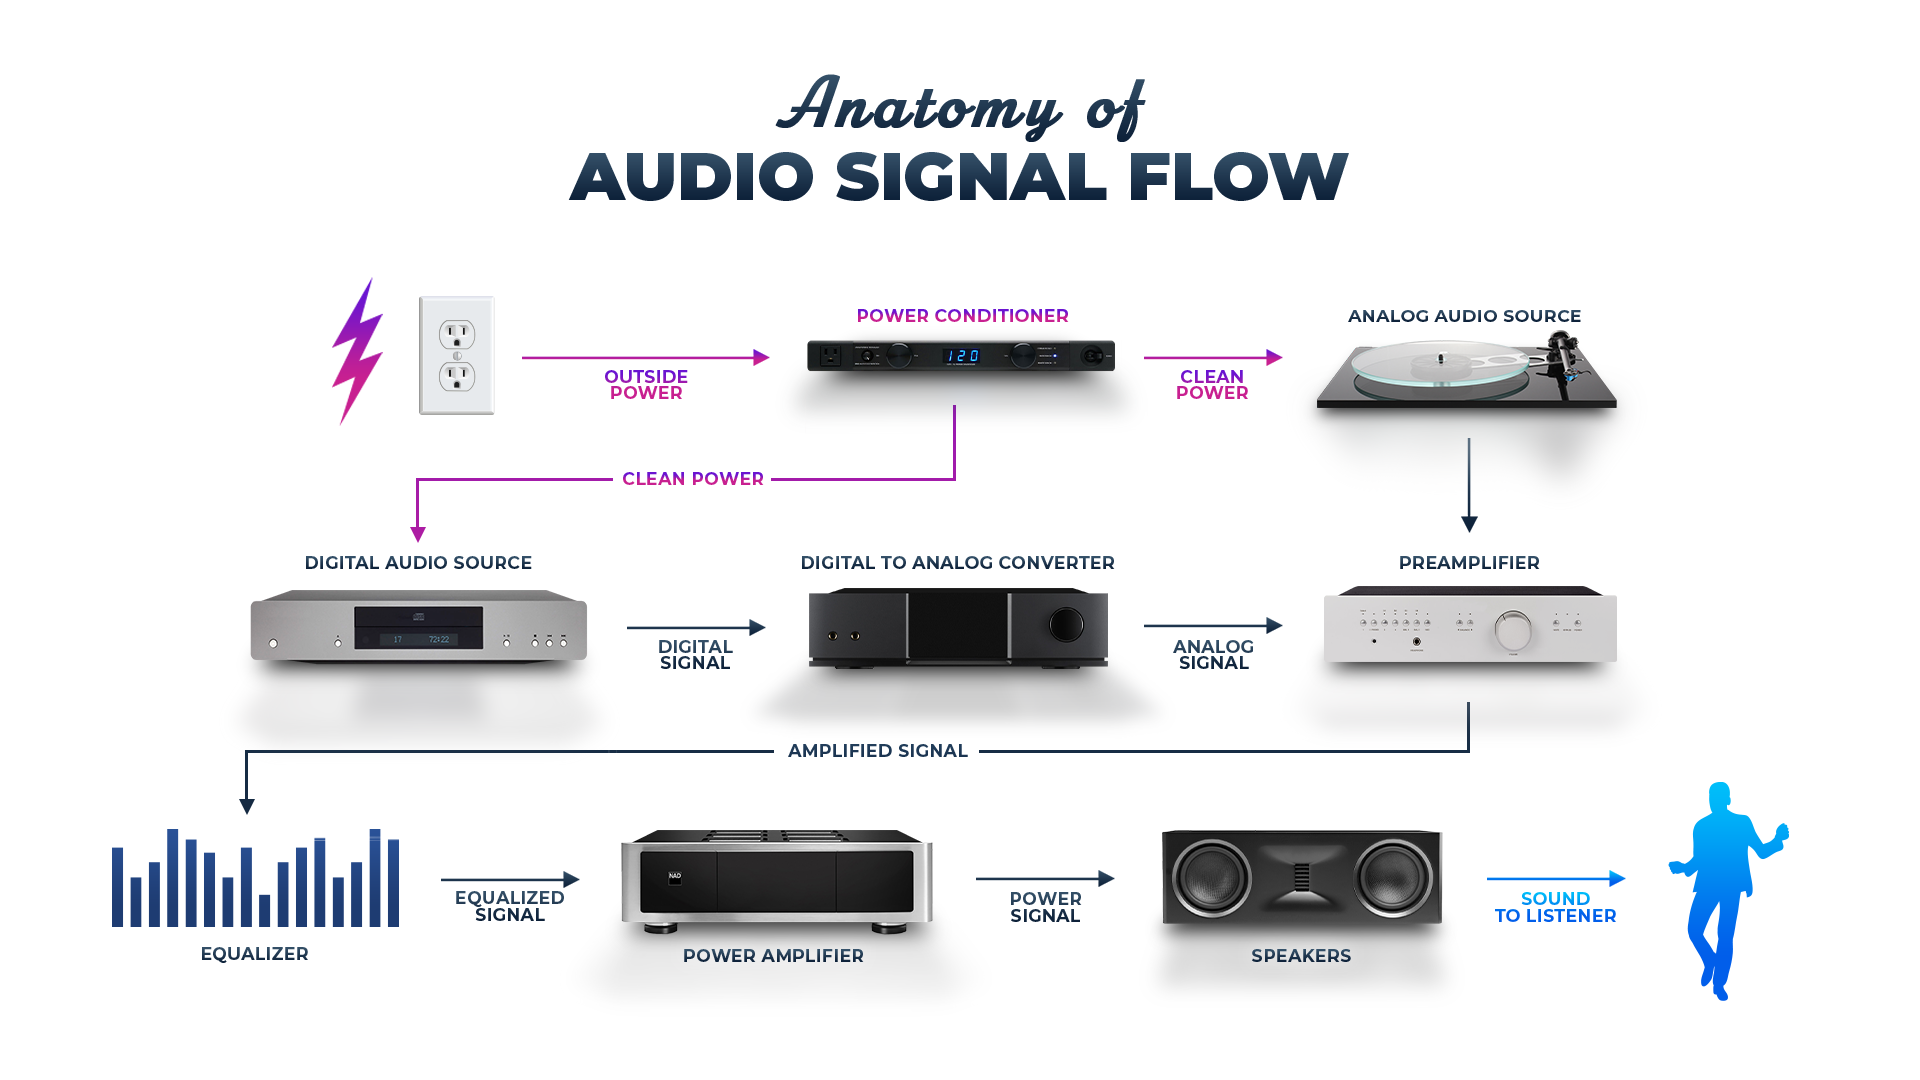
Signal flow is the linear, all-encompassing progression of the audio signal from one stage to another in a single series of sequential steps. The signals running within your stereo system flow in a singular direction, forward through the components. Think of it as runners running a relay race. Each runner is a component in the system; the baton they pass is the audio.
The starting line is whatever you use to play music: turntable, CD player, tape media, streamers, phone, computers, etc. The finish line is your speakers or headphones. To get from start to finish, your system utilizes the help of other components taking turns to move the audio signal forward or “passing the baton.” Understanding the flow of electrical signals and data through the inputs and outputs of your gear is critical for understanding how your stereo system connects and functions.
So if you're adding new components to your stereo system and can't figure out where it needs to be to make it all work, we can help. We've been in the audio business for over 40 years and know the tricks of the trade to help optimize your stereo system. Whether you're just starting or an experienced audiophile, this article will have the information you need to spend less time troubleshooting and more time listening.
The Basics
A lot goes into the signal flow, but once you have a basic understanding of outputs, inputs, and cables, you'll be much better off as you grow your system.
So, where do you begin? The same place as your signal: the source. To understand the signal flow, you must identify if your audio source is analog or digital. Turntables and cassette players are analog sources, while things like CD players, CD transports, and streamers are digital. It may seem obvious, but the type of audio data your source produces significantly impacts the signal's path through other components.
Signal Levels
Audio signal levels refer to the amplitude or strength of an audio signal, typically measured in volts (V) or decibels (dB). The signal level of an audio source or component determines how loud or soft the sound will be when played through speakers or headphones. There are several standard audio signal level classifications:
- Microphone Level: Microphone level signals are the weakest audio signals, typically in the millivolt (mV) range. These signals come directly from microphones and must be amplified to line or instrument levels before further processing.
- Instrument Level: Instrument level signals come from musical instruments like electric guitars, bass guitars, keyboards, and synthesizers. They are stronger than microphone-level signals, usually ranging from millivolts to a couple of volts.
- Line Level: Line level signals are the standard audio signal levels used for most audio equipment. They connect devices like CD players, media players, preamplifiers, and other audio sources to amplifiers or receivers.
- Consumer Line Level: Consumer line level is used in most home audio equipment, and the nominal level is around -10 dBV (decibels relative to 1 volt). It is commonly found in consumer audio devices like CD players, DVD players, and smartphones.
- Professional Line Level: Professional line level is typically around +4 dBu (decibels relative to 0.775 volts) and is commonly used in recording studios, professional audio equipment, and professional-grade audio interfaces.
- Speaker Level: One of the most important to note is the speaker level signal. These are the highest-level signals used to drive speakers directly. These signals can range from a few volts to tens of volts, depending on the power requirements of the speakers and the amplifier's output.
It's important to note that various regions and industries have different audio signal level standards and conventions. For example, in pro audio settings, the nominal levels might differ between the United States and Europe. Additionally, some modern audio equipment uses digital audio interfaces like AES/EBU or S/PDIF (Sony/Philips Digital Interface), where signal levels are represented by specific digital protocols rather than analog voltage levels. Understanding audio signal levels is essential for proper signal routing, equipment compatibility, and ensuring optimal audio performance in an audio system.
Analog Flow
Turntables and other analog outputs process and output analog signals, but they need a signal boost or a pick-me-up before moving on through the chain. They find it in the phono stage. This type of preamplifier is needed for analog signals like cassettes or vinyl. This is because analog source signals are below line level, and phono preamps must boost the signal before your amp can register it.
Line-level signals still aren't strong enough to drive your speakers; that's where powered amplifiers boost the signal even further—the additional signal boosting stage results in a signal strong enough to pass along to your amplifier to drive your speakers.
Basic Signal Flow Example:
Digital Flow
If you primarily use a CD player, CD transport, or music streamer, your signal will be binary data (0’s and 1’s). Amplifiers and speakers are analog connections, so they can't process that digital information. The solution is a DAC or digital-to-analog converter. Every device producing or containing digital audio data needs a DAC to continue down the signal chain.
To keep it simple, DACs are signal converters. Think of it this way: the DAC is the bridge between connecting your digital sources to your analog stereo system. They read digital information and copy it as close as possible through analog waves. Once that happens, a DAC can output the analog signals into a pre-amplifier, ultimately, your speakers.
Basic Digital Signal Flow Example:
Connections
Understanding what component follows the next is essential, but so is understanding how those devices connect and what cables you’ll need to make that happen. While you’ll probably utilize RCA cables for analog connections, you may also need digital cables for your digital connections (DAC, CD transport, CD player, computer, etc.).
Analog Connections
Fortunately, connecting an analog signal chain is relatively straightforward at a basic level. You'll first need a pair of RCA-to-RCA cables, or other analog cables (or several for connecting multiple analog source components), like these from Pangea Audio. Typically, you can identify an RCA cable from the white and red ends. The connection is stereo, meaning specialized for a two-speaker setup, and is color-coded to their left and right connections.
For example, if you were connecting a turntable to a phono preamp, you'd plug one of each end of the cables here (red and white output of the turntable into the phono preamp inputs). And you would connect another pair of RCA cables from the output of the phono preamp to you, an auxiliary input of your stereo’s preamp (this would then be followed by connecting to an amplifier than the speakers).
Signal Flow
You can follow these RCA outputs through almost all of your system until bridging your amplifier and speakers. In which case, you'll need some speaker wire. We'll delve deeper into speaker wires soon.
Digital Connections
A connection is needed to transmit digital audio data to bridge a digital source and your DAC. There are a few standard options that you’ll be able to find on most CD transports, streamers, and DACs.
Not all transport/streamers and DACs have the same connectivity compatibility. One of the first things you should look for in a DAC is if it features the correct input connections to match your digital source device’s output(s). As mentioned earlier, the DAC is the last stop for digital information. After the DAC, the rest of your signal chain will be analog, which helps simplify things.
Integrated Components and Bypassing
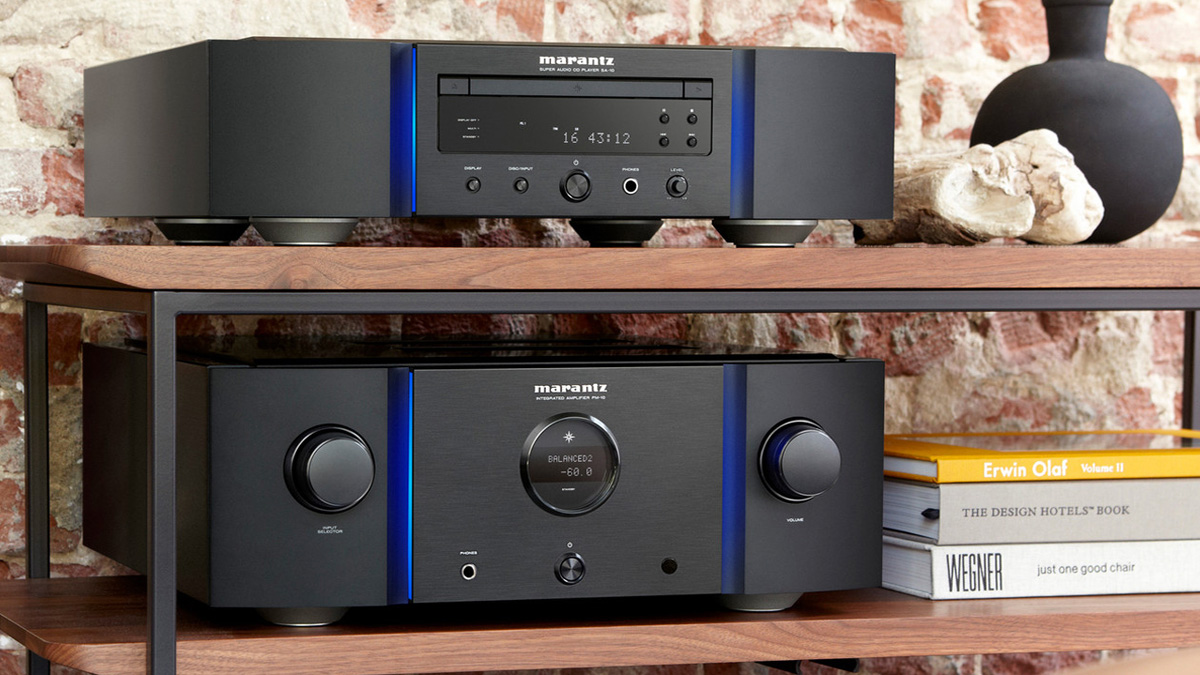
Not everyone will use the same amount of components. Some products, which we refer to as separates, are singular-function devices that perform their respective tasks individually. Other gear, which we’ll refer to as integrated, may include multiple stages of the signal chain at once.
Examples of integrated components:
- Turntable with phono stage preamp
- Integrated amplifiers (preamp + power amp) (sometimes with a DAC)
- Powered Speakers (amp + speakers)
- CD Player (Transport + DAC)
Many integrated devices include outputs that bypass the built-in component and run the data or signal through a separate. If you currently have an integrated device and plan to bypass it, ensure it has the necessary outputs for whichever component you add. Bypassing an integrated component doesn’t disrupt the signal chain, so you’ll take the same steps to complete the chain. The general rule for many audiophiles is that separates perform better, but that’s not always the case for your system. Plenty of payoffs and drawbacks exist, so grow your system in the best way possible for your space and wallet.
Speaker Wire
Many options and variations are available regarding stereo connections, and the type of stereo wire you choose can impact the sound quality. Each one tends to perform and cost differently. Some stereo wires may be more suitable for certain systems or environments, depending on factors such as the cable length required or the audio system's overall quality. In addition, it is important to ensure that the stereo wire chosen is compatible with your audio system to avoid any potential issues or difficulties.
Gauge Size
Speaker wires come in a multitude of different sizes or gauges, which affect how much voltage they can run. The gauge of wire will heavily depend on the length, wire composition, and how much power is needed. The three most relevant wire gauges to audio are 12, 14, and 16. The lower the gauge, the thicker the wire, so 12 and 14 gauges are thicker and meant for higher-powered systems and running longer distances, while 16-gauge wires are most effective for shorter runs.
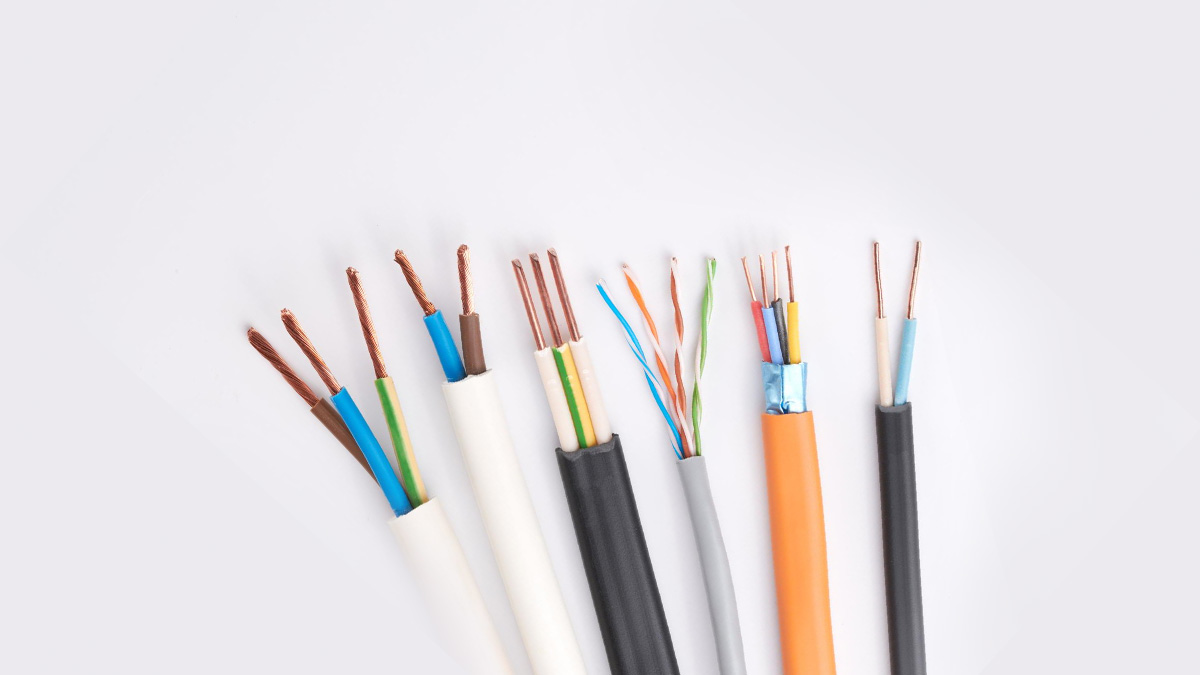
Material
The first option is aluminum copper wire. This is the least expensive option but still plenty capable. Because of the aluminum, the resistance is slightly different than pure copper. You'll need thicker aluminum copper wire to perform the same output as a thinner pure copper wire.
One of the most common wire materials, copper, is the classic, highly effective option for speaker wire. The many strands of copper wrapped together make for excellent conductivity, which is why it's been a go-to choice for many manufacturers for years.
Silver has the potential to outperform other alternatives due to its high conductivity and low resistance. There are silver-plated and pure silver options available. While both options work well, pure silver often performs better due to its higher purity level. However, it does usually come with a high price tag. Despite this, the many benefits of using pure silver wire, such as its superior conductivity, make it a popular choice among professionals and enthusiasts alike.
Hertz, Watts, Current, and Voltage
When looking at equipment, a few spec-related terms may repeatedly appear in Hi-Fi audio. These are current, voltage, watts, and hertz, and they are essential in various aspects of the audio system. Here's a brief overview of their significance:
- Current: Current refers to the flow of electrical charge through a circuit and is crucial for powering components such as amplifiers, which drive speakers to produce sound. The current-carrying capacity of the power supply and wiring is important to ensure that all components receive sufficient power to operate effectively without voltage drop or distortion.
- Voltage: Voltage is the electrical potential difference between two points in a circuit. In audio systems, voltage is used to represent the amplitude or strength of the audio signal. It determines the volume or loudness of the sound speakers or headphones produce. Amplifiers increase the voltage of the audio signal to drive the speakers and reproduce the original sound faithfully.
- Watts: Watts represents the measure of electrical power used in an audio system. In the context of Hi-Fi audio, watts are often used to describe the power output of amplifiers. Higher-wattage amplifiers can provide more power to the speakers, allowing them to play at higher volumes or handle more complex audio signals without distortion.
- Hertz: Hertz (Hz) is the unit of frequency, representing the number of cycles per second in an audio signal. Hertz is critical in describing the frequency response of speakers, headphones, and other audio equipment in Hi-Fi audio. The range of human hearing is typically between 20 Hz to 20,000 Hz, so a good audio system should be capable of accurately reproducing this entire frequency range.
When selecting audio equipment, it's important to consider these factors to ensure the components work harmoniously to deliver high-quality sound. Proper matching of amplifiers and speakers, understanding power requirements, and verifying frequency response specifications are essential to setting up an optimized Hi-Fi audio signal flow.
Mastering Signal Flow
Signal flow is one of the most important knowledge bases as you delve deeper into Hi-Fi audio. With the massive variety of add-ons, devices, and other appliances, knowing where and how everything fits in your system before making any sort of investment is essential. Remember, this was still a simple breakdown of a complex topic. There’s always more to learn about the signal chain, especially as new components are developed. If you’re adding existing components to your system for the first time, understanding the fundamentals of the signal chain will help immensely.